

Christmas in Our Kitchen | Talk of the House Blog Tour
Happy Friday everyone! And welcome, Talk of the House readers! I was very flattered when Kelly asked me to participate in her Christmas in the Kitchen blog tour! Kelly's home always looks so incredibly put together and cozy, especially at Christmas! Even better than her decor though, is her kind spirit and genuine heart. It is a pleasure to be a part of her first blog tour.

As for my kitchen... I like to keep the Christmas decorations to a minimum. I have a couple rules that I abide by. The first is to keep it fresh! I don't mind using a little faux greenery here and there in other parts of the house, but in the kitchen I want to be surrounded by fresh and real decor (greens, berries, citrus fruit). And yes, this means things die and need to be replaced, but I always pick up a bunch of flowers when I'm at the grocery store, I just make sure they feel more Christmas-like in December. I also really like the food to take center stage. I bake a lot this month, both for my family and for others and I like to see a plate of cut-out cookies cooling on the counter or let the smell of ginger and cinnamon fill the kitchen or see a bundle of kraft boxes tied with twine waiting to be gifted to friends and neighbors. This feels like Christmas to me. I try to keep the counters free of clutter and knick knacks too. Since I have such a small kitchen, too much non-essential stuff tends to zap me of inspiration and energy.

^^ Here was our kitchen last Christmas when photographed for Midwest Living, read more here.^^

^^ The open shelves this year. The only Christmas addition is fresh greens and berries in a couple of the ironstone jars. Oh, and the bottle brush trees courtesy of Charlie, who said I needed more decorations. :) He doesn't quite get my less is more aesthetic in the kitchen. Haha. ^^

^^ A bowl of clementines and a swag of greenery clipped from the yard is all that is needed. ^^
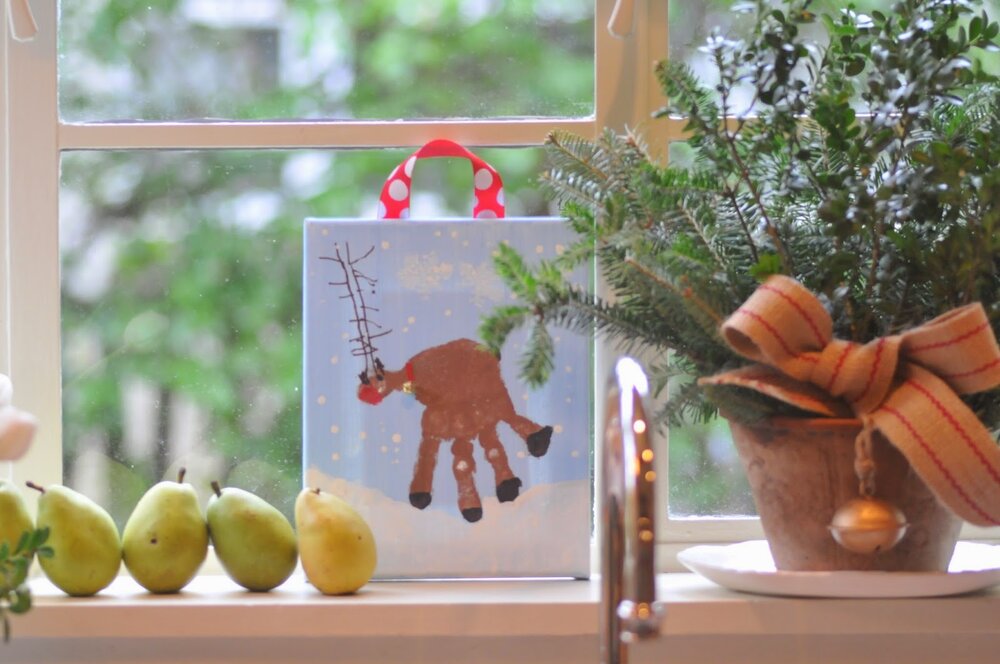
^^ Precious art made by little hands is my favorite kind of decoration. ^^

^^ Can you tell some of these photos were taken on a very dark and overcast day, and others, like this one, were shot in the bright, chilly light of morning^^


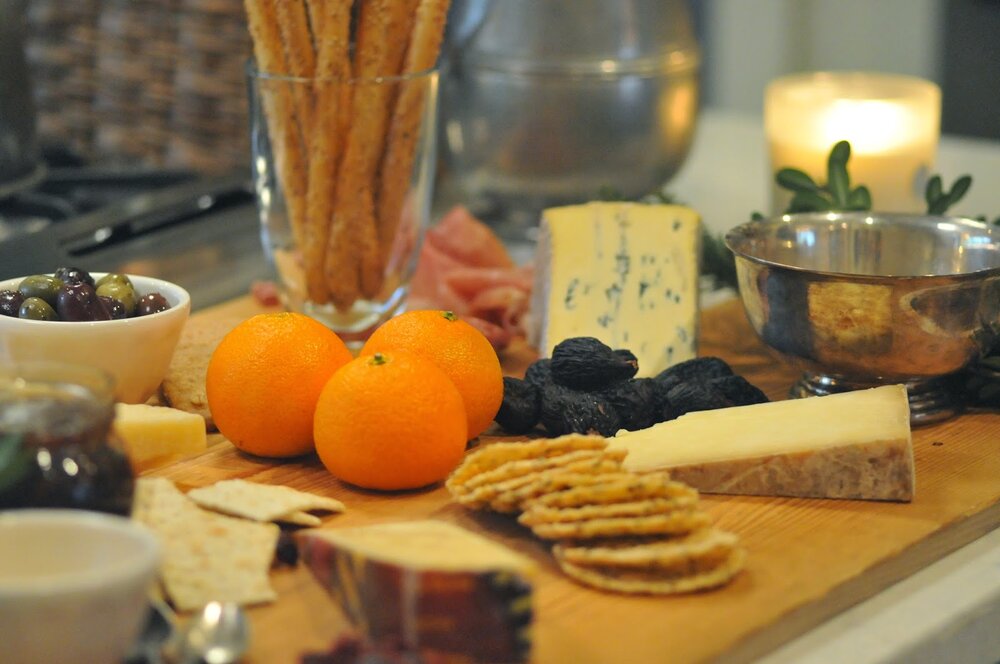
Kelly also asked me to share a holiday recipe. I have so many sweets on this blog that I love to make, but I decided instead I would share an idea for easy holiday entertaining. Who doesn't love a beautiful cheese board?! I know there are many inspiration images out there and some how-tos, but I still have friends that tell me theirs look like a disaster when they try to assemble them. So, I'm going to try break down my method because so many of us want to entertain over the holidays but the thought of pulling something together seems rather daunting. A cheese board is fast to assemble, always a hit, and makes an impromptu get together so much more likely to happen. Say a couple hours before school pick up with a few girl friends, or an after shopping, late afternoon, let's have wine and cheese for dinner, sort of affair, or add some bubbly to the mix and lots of candles and bam, you have a cocktail party!


Step 1: Choose a Wooden Serving Board
You can go big, like this antique bread board, leaving the items more sparsely arranged, or choose a smaller cutting board and have it over flowing and bountiful - both are wonderful.
You can go big, like this antique bread board, leaving the items more sparsely arranged, or choose a smaller cutting board and have it over flowing and bountiful - both are wonderful.

Step 2: Cheese Selection
Here's my one piece of advice, most people, at least those I'm related to and friends with, aren't cheese snobs, they like to try a little something new but it helps to include some flavors everyone knows and loves. People like to work their way up to the stinky cheeses. :) I always have a triple cream brie and a sharp English cheddar. This time I also had a Gouda, Parmigiano Reggiano, and Cambozola (way more approachable than a Stilton). I like to point the centers of the cheese wedges to the center of the board. I typically start slicing one or two of the cheeses, but forgot this time until I put away the camera, again it encourages people to start nibbling, sometimes being the first to take a stab at a wedge of cheese is a little intimidating.

Step 3: Add Little Dishes of Yummy Things
I always have fig spread and honey because they pretty much taste good with every single cheese. I like to include different sized ramekins and little silver bowls to add some interest. I have Marcona almonds in the silver bowl. Adding height with the wine bottles and breadsticks creates a pretty composition. I don't always have space on the board for the wine bottles, but I did this time.

Step 4: Salty Meats (optional)
I like them, so they usually get added. The best cheese boards offer a mix of textures and flavors, salty and sweet options and pairings. I put the prosciutto next to the breadsticks since it tastes great wrapped around one. I also had a dry Italian salami.

Step 5: Crackers and Fruit
Again, mix sizes and textures. I had a mix of sweet oatcakes, sesame crackers, and pesto Parmesan crisps. For the fruit, I added dried figs and dried cranberries and fresh clementines. The clementines don't pair well with the cheese but they are perfect for dessert, when you want to freshen your palette, plus they look great at Christmas!

Step 6: Add Greenery
Adding a little fresh greenery makes it feel more special occasion worthy! If you are adding large leaves, then I would actually put those down first and the cheeses on top, but in this case they are just a pretty decoration on the side, so it is easiest to add them last. And that's it. In all, maybe 15 minutes to set up and that was with taking pictures along the way!


Thanks again, Kelly!!
Be sure to stop by the other homes on the tour as well - some of my very favorite bloggers!