

Pinecone Garland Tutorial

I felt myself being pulled in a more classical, less whimsical direction and it's been fun to change things up ever so slightly. I do think, as an instagram friend mentioned, that as your children get older you feel a shift in how you create a cozy holiday home. At least that was the case for me this year. I also took a little break from the traditional red (which I LOVE) and went with a more coppery, gold, green and brown scheme. I will post more photos later in the month, but I thought this pinecone garland was such a fun and easy project, I didn't want to wait too long to share how we made it.
Another change I've made as I grow older and wiser, is less fresh greenery (unless it's in water or outside) and adding other natural elements that have staying power - pinecones. cranberries, acorns, etc. I like to start decorating early and keep it up till New Year's day (or later), so using fresh greenery that needs daily spritzing (a mess that doesn't really work and soaks my woodwork and frames and art...) and requires eventual replacing, isn't practical. I have little bunches in pitchers and planters that I can water, but when it comes to garlands and indoor wreaths, I find good quality faux to be a game changer even if it isn't the bloggerly thing to say. For our dining room I will add fresh greens to the chandelier a couple days before Christmas but till then it will be bare.
Speaking of garlands with staying power, I have always loved the idea of incorporating a pinecone garland. Like here with magnolia and pine:
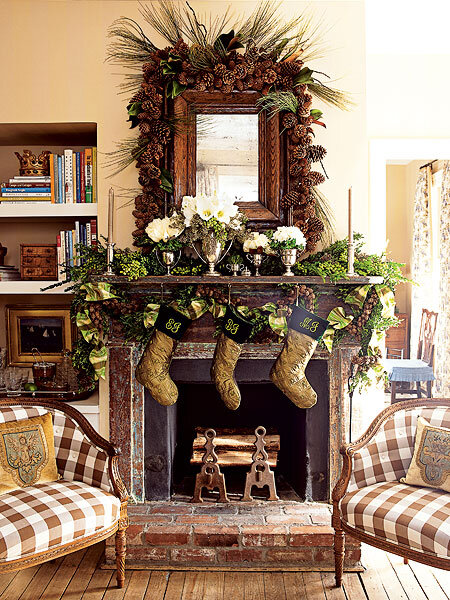
I shared this Carolina cottage a few years ago back from Southern Accents. It still remains one of my all time favorite Christmas homes. When I made the first garland for my mantle, my plan had been to copy this and use it to frame my ship painting, but the garland started to get pretty heavy and I was afraid it might come tumbling down. I'm guessing they used nails here to secure it. I'd be worried Command Hooks might not hold up.
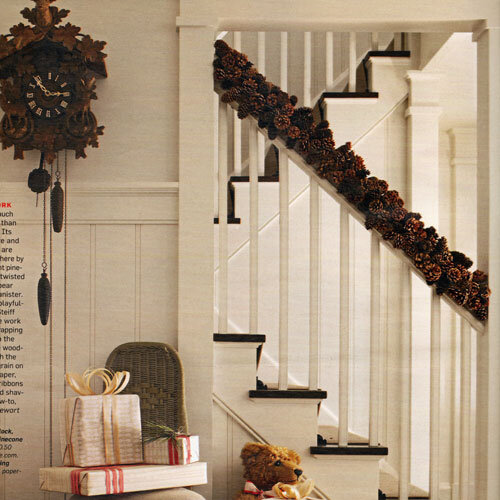
I also love it here just simple along the banister. From an old Martha Stewart Living magazine.
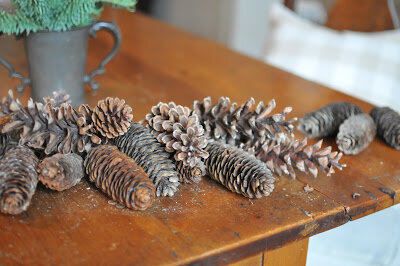
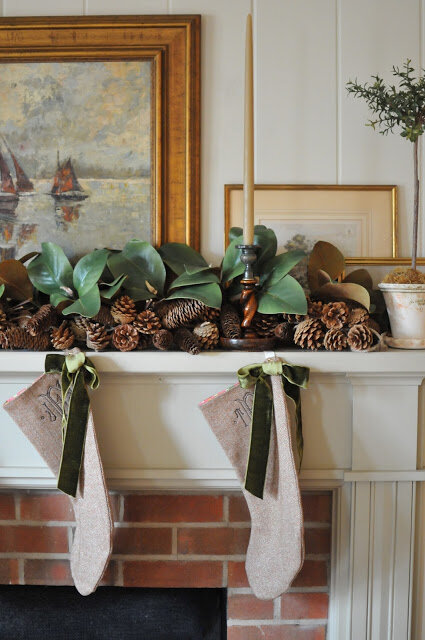
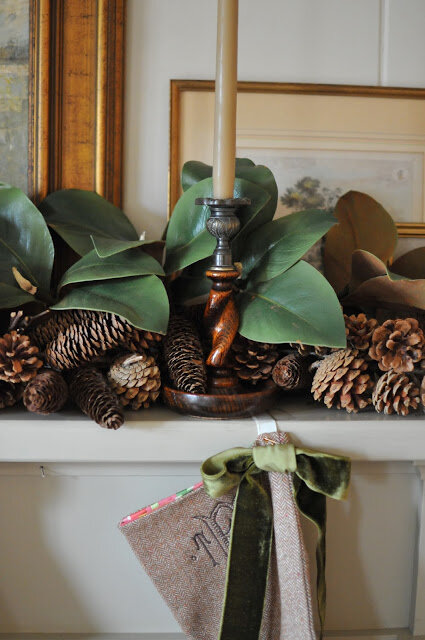
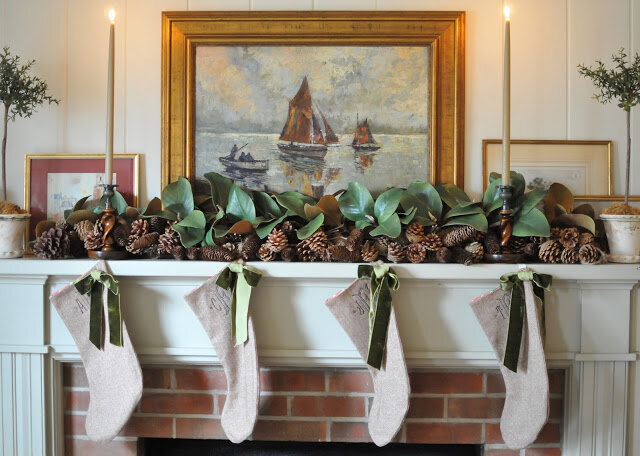
It is so easy and fun to make your own. I wish I had done this years ago! It gives you a good excuse for a long hike to gather pinecones too, which makes it fun to have a memory attached to the garland. For the garland on the mantle I did supplement with some store bought pinecones to add some variety in shape (I bought the rounder, very open, pinecones from Save on Crafts (dot) com. I think there is a new google policy about not using direct links to products in posts unless it is a sponsored or incentivized link. I need to look into it, but in the meantime, I will just list sources. Sorry, a bit annoying for all of us, but I've had to go back and remove old links from one company already and it wasn't fun). I used about 100 pinecones, give or take, to make a 5 foot garland.
Here's the 3 step process:
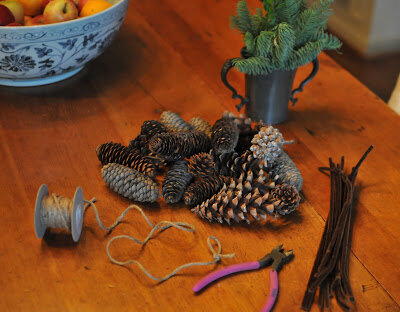
You'll need:
Pinecones in different shapes and sizes. About 100 for a 5 ft garland.
Jute twine (any craft store or Walmart sells this)
Wire cutters
Thin craft wire or brown pipe cleaners (I used a thin wire on the mantle garland and grabbed the pipe cleaners so you could see how they attach, but they worked just as well and might be gentler if you have little hands helping you!)
Optional: greenery (fresh or faux to weave in after the garland is in place)
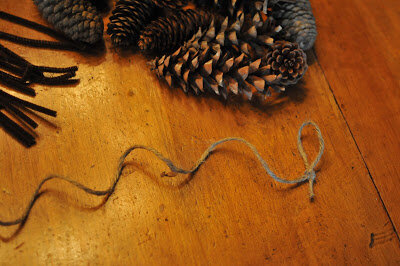
Step 1: Cut string to the desired garland length. Tie off the ends in loops, this helps if you want to hang it, but it also makes it much easier to carry around.
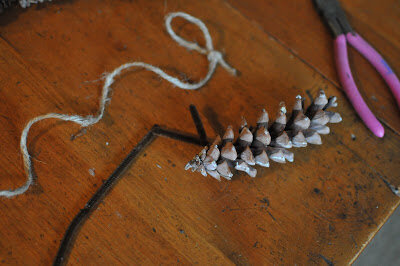
Step 2: Wrap a small section of wire or pipe cleaner around the base of the pinecone, tucking it so you can't see it.
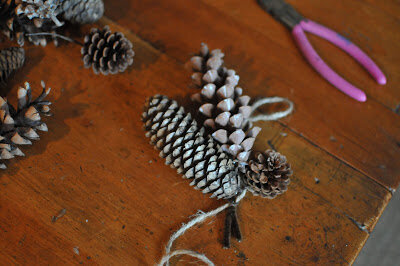
Step 3: Twist the ends of the wire or pipe cleaner around the twine and keep going, layering more pinecones as you go. It's best to weave in the smaller (filler) pinecones in at the end.
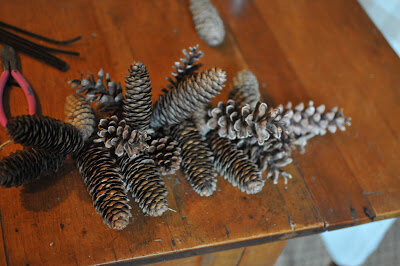
In process... you can make it as full as you like. I did clip the pipe cleaners after twisting them on the twine to hide them a bit better. The pinecones are very flexible and easy to position and move around even after they are attached.
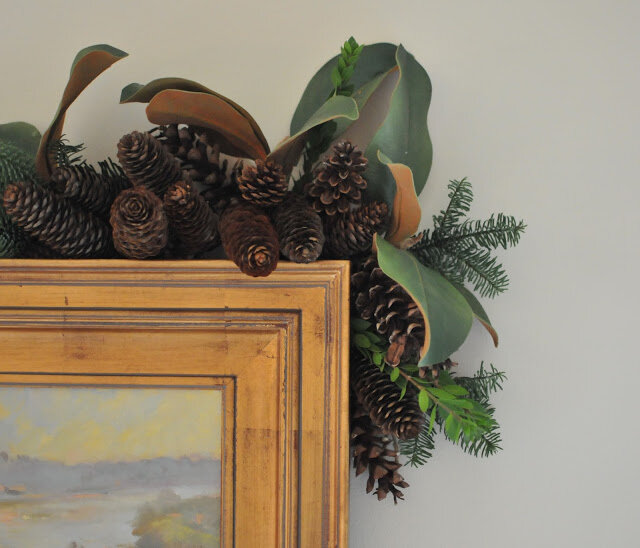
Here is the garland I made above, over a frame with greenery tucked in. I just draped it over and it stays fine. Longer garland will be heavier and require hooks or nails it you want to hang over mirrors or artwork.
Please let me know if you give it a try! I'd love to see pictures if you post on instagram too. This is my kind of holiday craft, simple with quick gratification and the whole family can help out in the process.